
Wow. Have you ever had a teeny tiny project that has been bugging you and once you finally do it, you're like "why did I wait so long to do that?!"
For me, that was our entryway! A specific part of it, but I'll share more about that in a minute...
I bought this paintable wallpaper a month ago and was planning to wallpaper our dishwasher (I know, sounds crazy!) but then I decided I wanted to do a project with a bigger impact. I had been eyeing peg rails on Pinterest for *a while* and finally decided to go for it and build one in our very small entryway to our 1955 ranch!
We moved into our house about 10 months ago, and as I'm updating rooms, I'm leaning into cottage vibes, but I also love a modern moment, so I had a hard time deciding which way to go in our entryway. Ultimately it came down to space. The wall I had to work with didn't have clearance for a table or any kind of furniture, so I thought it would be the perfect place to try a peg rail.
I was also swayed by the minimal investment required! 2 pieces of wood and a little elbow grease vs. having to buy a new furniture piece and art to fill the space. SO I decided to start with a peg rail and cottage vibes and I'm glad I did. Of course, this space could be updated in the future, but I'm loving it after round one of updates!
I didn't do a great job of documenting this project with photos but here is my series of Reels videos: part one, part two, part three.
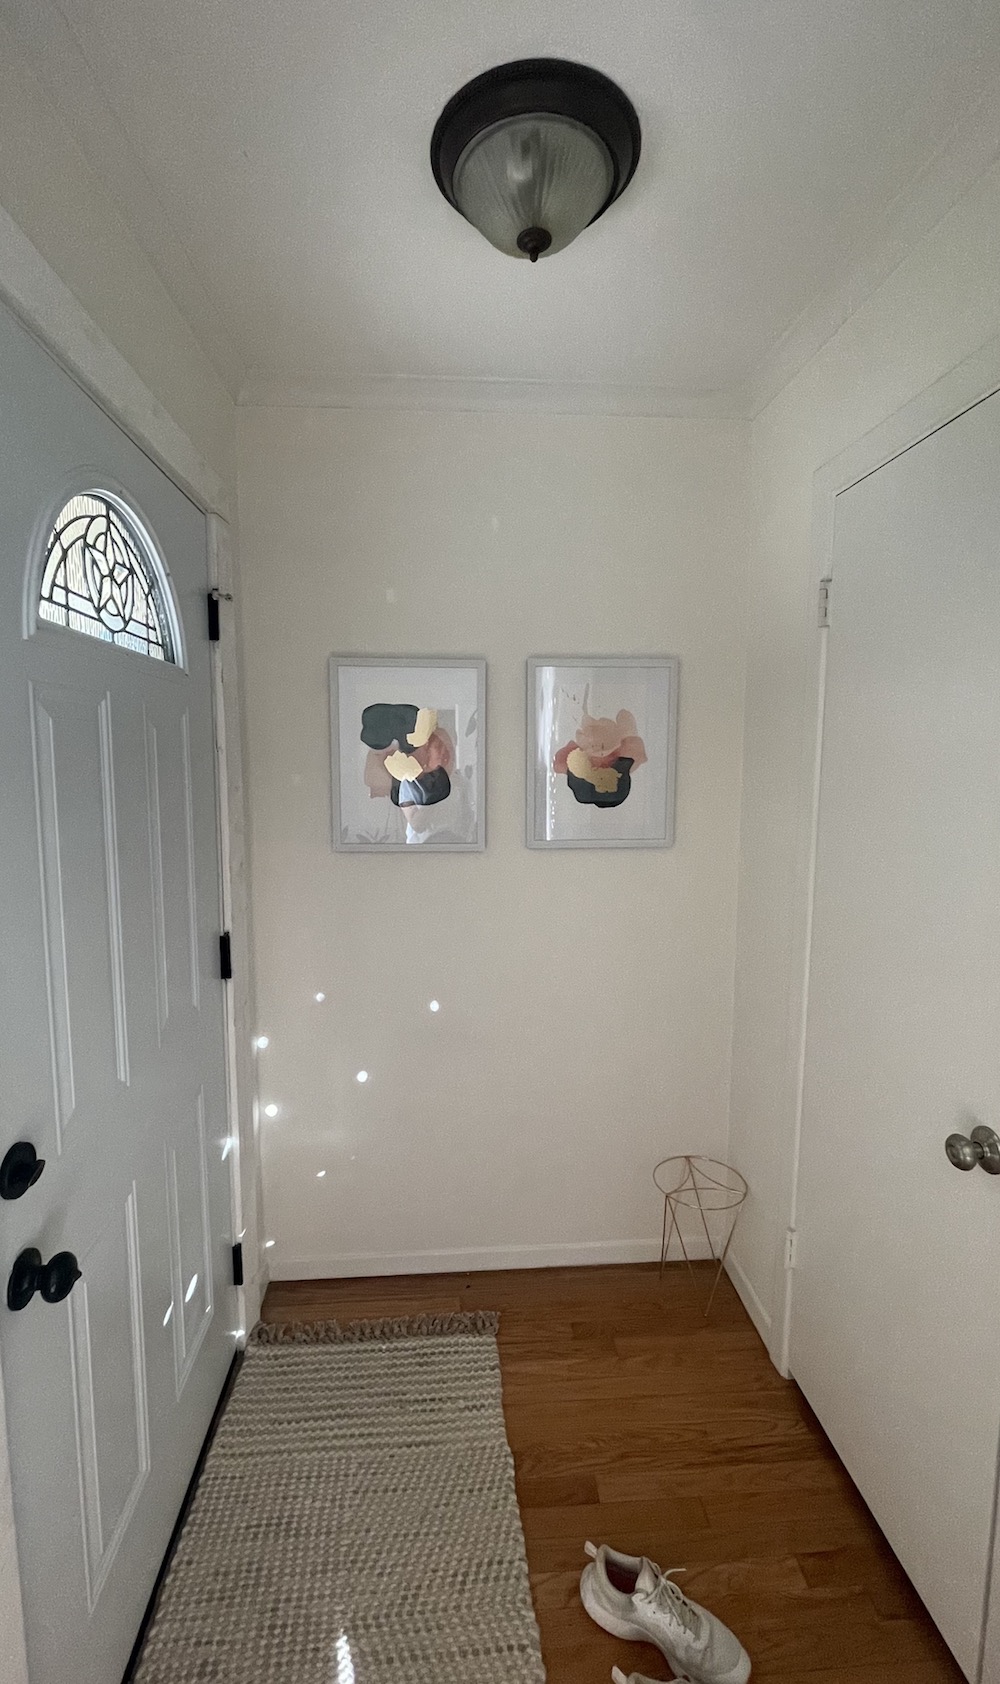
BEFORE
The old entryway had zero personality and the light fixture was so sad and barely gave any light! It looks like the previous home owner had DIYd the front door installation (and did a terrible job!) and the door trim was TRASH. This keeps me motivated to finish my DIY projects and to actually do a good job on them!
So I decided to use the beadboard wallpaper on the bottom 2/3 (ish) of the entry wall and then add a peg rail and a shelf to display some art. Then last minute, I decided that I wanted to paint the front door and door trim, and wow, I'm shook....it looks 1 million times better!

DIY
Supplies:
- beadboard wallpaper & smoother
- pegs
- 5" board x 53" (length I needed to fill my wall) for the peg rail
- 3" board x 53" for shelf above peg rail
- screws, long enough to go through my 1" board and into the studs.
- drill
- paint supplies
I started with the beadboard wallpaper. This doesn't have to be precise, because you will be covering the top of it with your peg rail. I followed the instructions and soaked the strip of wallpaper for 30 seconds, then let it sit for 5 minutes, then apply it to the wall and smooth it out. This was my first time to wallpaper and it was a little scary, but my husband helped me hold the paper up and smooth it out, so it went fast. By the third strip, we felt like we were pros and it started to get a lot easier.

After the wallpaper, it was time to install the peg rail. We "pre-built" the peg rail by screwing in the pegs before attaching it to the wall. I've seen it done a few different ways, but this was easier for us. I measured the length of the board and spaced my pegs out evenly. The pegs I used are fantastic and no pre-drilling holes was required! If I was doing it again, I would paint the peg rail outside before hanging it, but it was fine.
I screwed the peg rail wood directly into 3 studs to secure it to the wall.
I attached the shelf directly to the peg rail once it was installed. The shelf won't be holding anything too heavy but I still wanted it to be secure.
I painted the peg rail and shelf and then planned to paint the wallpaper white to match the wall. I started painting, and the beadboard texture almost became invisible! I decided to stop painting and share the progress with my IG family to get suggestions.
I either wanted to leave the beadboard as-is or maybe try to paint it greige and hope that the beadboard texture showed through. IG voted to leave it white and move on! So I did. :) I

My husband changed the light fixture and I love it! The old fixture left a large ring of unpainted ceiling, but luckily the ceiling texture was in place, so I touched up the paint with a few paints I found in the garage.
I moved on to the front door. I wasn't originally planning to do anything to it, but after we installed the new light fixture, the terrible door trim was SO noticeable. I had to do something. I wanted to rip it out completely, but like I said, I wasn't planning to do *anything* to it originally, so I didn't want to turn it into a major project.
I sanded all of the gunk off of the trim, then filled all of the holes and dings. I gave it a base coat of trim paint and it already looks so much better! I'm so glad I did it!
Of course that led to wanting to paint the front door black, so I went for it. It had been a while since I had painted anything black (my favorite!) and it made me so happy!
I love how it turned out. This front door is definitely getting replaced, but there are many other priorities ahead of the front door, so this is my quick fix for now.

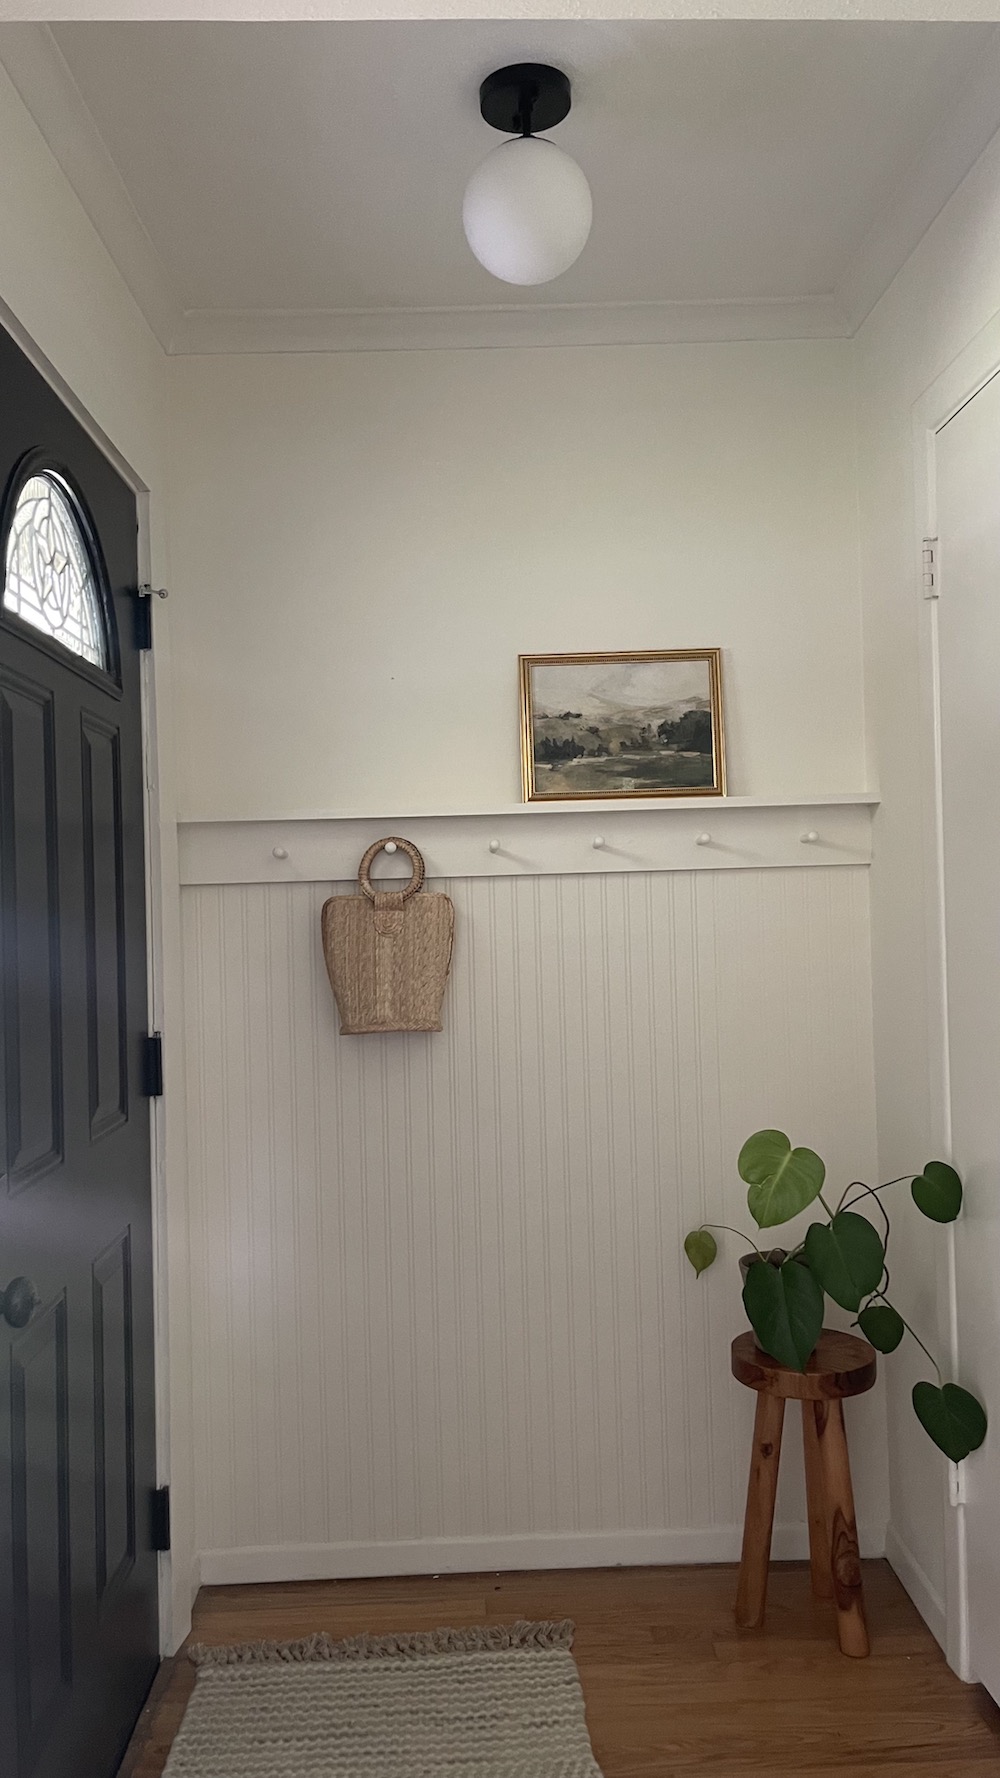
It looks so much better, much more welcoming, and even added a bit of functionality to the entryway, providing a space to hang jackets, bags, etc. I still need to accessorize and buy a new rug, but it looks so much better already!
DM me @rhondajenkins if you have questions about the entryway!